Are you wondering how to clean a kayak? Well, it’s really easy and simple to clean your kayak. Most kayaks are designed to require a minimum amount of maintenance.
Kayak maintenance involves cleaning the craft, protecting it from ultraviolet radiation, and storing it appropriately until your next adventure.
Why is kayak cleaning important?
Cleaning your kayak will make it look great. However, kayak cleaning is not just for aesthetic reasons. Here are more reasons to keep your kayak clean and maintained.
- Cleaning will remove dirt and salt that can lead to corrosion of the vessel.
- It prevents mold from growing.
- Regular cleaning of your kayak will help extend its lifespan.
- Regular cleaning will help you to spot any irregularities on your kayak’s hull.
- A clean and well-maintained kayak will serve you well when you are out on the water.
What is the best way to clean a kayak?
You can make a simple routine for cleaning your kayak. Regular cleaning should be a part of your kayak adventures. Here’s a simple cleaning process that you can follow:
- Position your watercraft in a clean and flat area.
- Rinse your kayak with clean water and a hose to remove any mud, dirt, salt, or clinging debris on the hull surface.
- Take a bucket and fill it with fresh water and a small amount of soap.
- Soak a sponge or cloth in your soapy water solution.
- Wash down the whole kayak. Also, remove any dirt buildup that did not come off during rinsing.
- Allow your kayak to dry completely before storing it. You can use a towel or a microfiber cloth for drying.
Kayak cleaning supplies
Cleaning your kayak requires only a few essential tools.
- Bucket to hold soapy water solution
- Running water and hose
- Sponge
- A microfiber cloth
- Latex gloves
- Car or kayak wash soap
- Cleaner wax, if wanted
How do you clean the outside of a kayak?
Cleaning the outside of your kayak is simple and easy. The vessel’s exterior is designed to get wet, and that makes the process a bit easier.
The most suitable way to clean the outside of any kayak is with a bucket, soapy water solution, and a sponge.
- Add some soap to the bucket and fill the bucket with water. You can either use a car shampoo or a kayak soap. The solution is soft and won’t damage the kayak’s surface but will remove most of the dirt.
- Dip the sponge in the bucket and wash down the exterior of the kayak with a soapy water solution. The stubborn dirt areas may need a little more pressure with the sponge to lift the dirt.
- Once you have washed the kayak, rinse the soap out of the sponge with running water. It would be better to run clean water from the hose over the kayak. You can use the sponge as well to help wash away the soap.
- Use the microfiber cloth to dry the outer surface of the kayak.
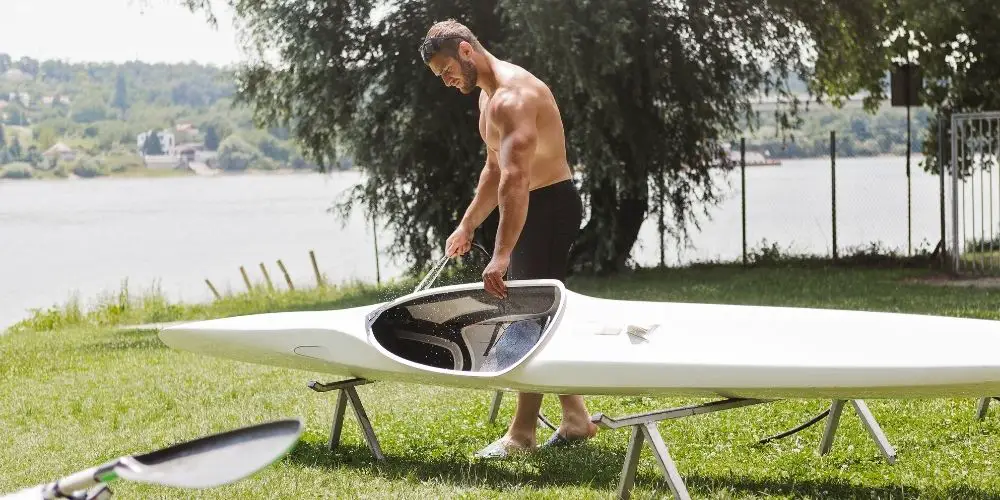
How do you clean the inside of a kayak?
The inside of the kayak is often more difficult to clean as compared to its outside. It is especially challenging in kayaks that only have a small opening to enter the vessel. Such watercraft can be hard to reach inside to clean out the kayak.
Usually, the areas that get the most mud and dirt on the inside are the footrests or the pedals used to steer the vessel. These are often covered with mud when the paddler climbs in with dirty feet.
- Wooden kayaks usually just need to be wiped on the inside with a damp cloth.
- You can spray down the inside of a composite kayak with a hose. You need to keep it low pressure and be cautious with the soft areas of the vessel.
- Plastic kayaks also need to be sprayed down on the inside with a hose or a pressure washer.
The most challenging job is to get the excess water out of the kayak. It’s vital because stagnant water sitting inside the kayak begins to smell and causes mildew to develop
Note: To remove stubborn stains, you can use a good quality stain remover once the kayak dries.
How do I make my kayak look new?
Exposure to heat and ultraviolet rays can fade the color of a kayak over time. Cleaning and applying protective coats can increase the life and durability of your kayak. You can easily patch and resurface the abrasions and holes and restore the color of a plastic kayak.
Thinking about improving the aesthetics of your kayak? Well, painting your kayak is a great way to make it look cool, particularly for old kayaks. New paint can make your kayak look new, shiny, and cover up any signs of wear and tear.
How can I make my kayak shine?
If you want to keep your kayak shining, use an ultraviolet protectant. It will also minimize the long-term degradation caused by UV exposure.
Applying wax to your watercraft can give an extra layer of protection against UV damage. Waxing will put a protective coating on the kayak and allow it to shed dust easily. A waxed kayak stays cleaner and requires less frequent washing.
Pro Tip: A kayak cover is a good investment to protect your vessel from sun damage. It will also keep the inside of your kayak clean and dry. Covers are designed to shelter the entire kayak.
Read more on how to transport and store your kayak.
In closing
So there you have it. It’s really simple and easy to clean your kayak. You just need to put little effort and attention into cleaning, protecting, and storing your kayak properly.
Cleaning your kayak will help to ensure your vessel looks great, functions effectively, and lasts for many years to come. You should do it at least every two weeks to ensure that the vessel stays in good condition.
Kayaking provides the opportunity for so many amazing adventures. Taking care of your kayak is just a smart practice to make part of your kayaking routine.
If you have something to share, don’t hesitate to reach out to us.
Until next time everyone!